This post may contain affiliate links. Please read my disclosure policy.
Yes, you read that right, these rolls are light and fluffy! These delicious gluten-free rolls are flavorful and have the perfect crumb. If you’ve never baked with yeast or made gluten-free rolls before, read this post and I’ll walk you through how to make them so you and your family can enjoy them too!
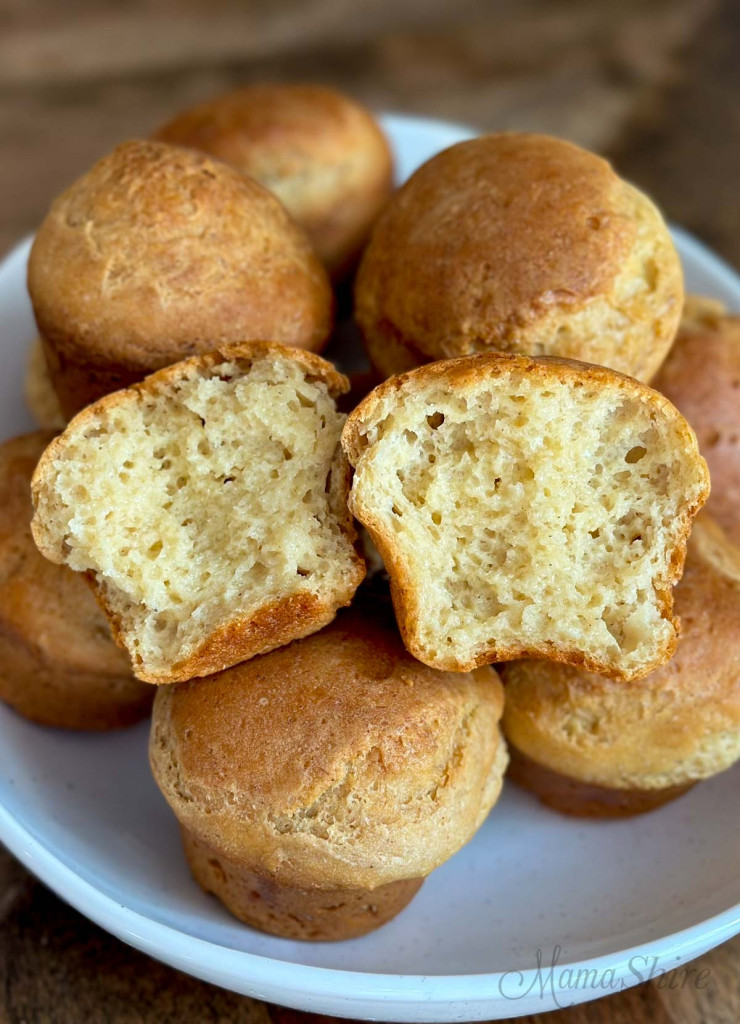
In just under two hours you can have these delicious gluten-free dinner rolls. They’re baked in a muffin pan and you can enjoy them within minutes of coming out of the oven! Pull them apart and slather some dairy-free butter or real butter on them for an absolute treat!
Jump to:
Ingredients for gluten-free rolls

3 cups Pamela’s Gluten-Free 1-1 All-Purpose Flour
1/2 cup sorghum flour
2 tablespoons psyllium whole husk
7 tablespoons cane sugar
2 1/4 teaspoons active yeast
2 1/2 teaspoons sea salt
2 teaspoons baking powder
2 cups water, warmed to 110°
2 eggs, beaten
1/3 cup olive oil
2 tablespoons apple cider vinegar
Ingredient notes
Gluten-Free Flour – Pamela’s Gluten-Free 1-1 All-Purpose Flour. You may be able to find this at your local grocery store but if not you can order it through the link or on the Pamela’s Products website. If you decide you like this blend, I would suggest ordering it in bulk through the website to make it very affordable. If you use another gluten-free flour blend be sure that it contains xanthan gum. If not add 1/2 teaspoon xanthan gum per cup of flour.
Sorghum flour – I use Bob’s Red Mill Sorghum Flour. This is for the four-pack but if you are just starting out and want to try a smaller package you can opt for a single bag. Sorghum flour gives these rolls a light nutty flavor that resembles regular wheat rolls.
Psyllium husk– Himalaya Psyllium Whole Husk. I like to use psyllium whole husk and not psyllium husk powder. At the bottom of this post, I have a photo showing the difference between rolls made with both types of psyllium.
Yeast – I like Fleischmann’s Active Dry Yeast or Red Star Active Dry Yeast. Both are gluten-free. One packet of active yeast is equivalent to 2 1/4 teaspoons. If you have a Costco nearby they sell active yeast in a package that is a very good price.
Instructions
- Prepare a 12-cup muffin tin by spraying the bottom of each cup with avocado or olive oil. You can also use a paper towel dipped in oil to wipe the bottom of each cup.
- Warm the water to 110°-115° and set aside.
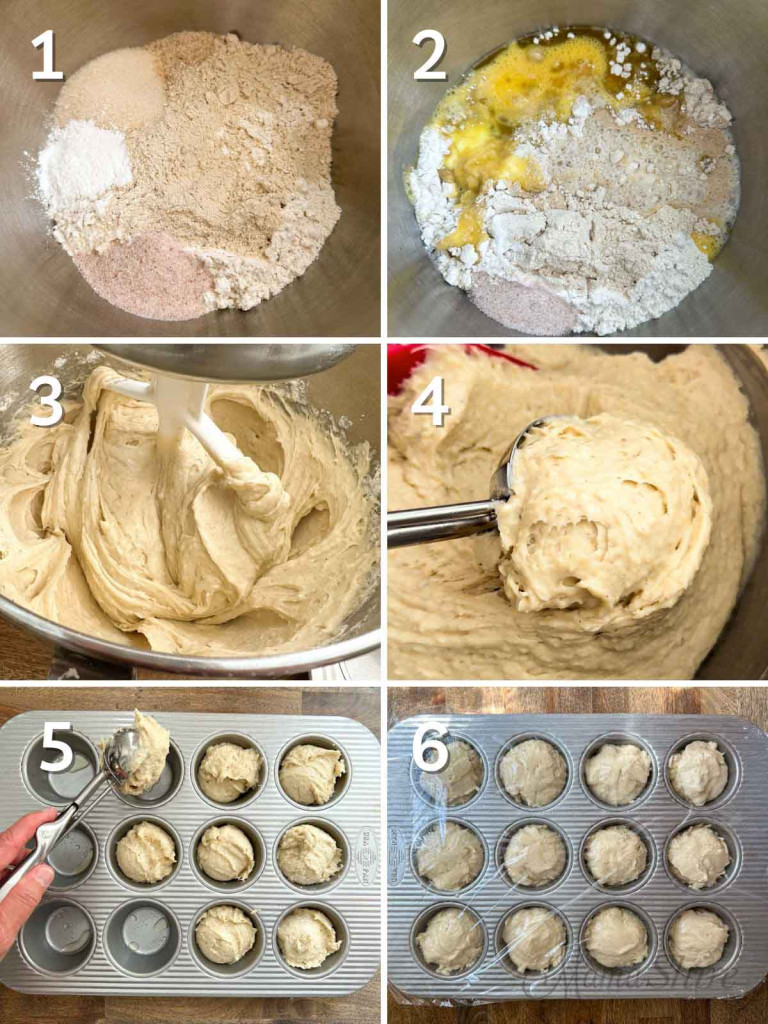
- In the bowl of a stand mixer fitted with a paddle attachment, place the all-purpose gluten-free flour, sorghum flour, sugar, psyllium whole husk, salt, and baking powder in the bowl of a stand mixer. Place the yeast into the bowl but place it opposite of the salt.
- Next, add the warm water, beaten eggs, olive oil, and apple cider vinegar into the bowl of a stand mixer.
- Mix on low for 30 seconds and then increase speed to medium and beat for 1 minute. Scrape down the sides of the bowl if needed.
- Spray a large muffin scoop or ice cream scoop with oil and use that to fill each muffin cup 3/4 full. You may need to add a little more or take away a little of the dough to even out the dough in each cup. Dip your fingers in water and use them to lightly smooth out the top of each roll. They don’t have to be perfectly smooth.
- Lay a large piece of plastic wrap on your counter and lightly spray it with oil and then turn it over to loosely cover the muffin pan. Let rise for 45-60 minutes. Don’t let the rolls rise so high that they begin to spill over onto the pan. The picture on the left below shows a good rise.

- Place the oven rack in the middle of the oven and then preheat the oven to 350°. (Baking the rolls in the upper half of the oven will help keep them from browning too much on the bottom).
- Bake for 45 minutes until golden brown. You can also test the internal temperature of the rolls with a food thermometer. The internal temperature should measure around 200°- 205°.
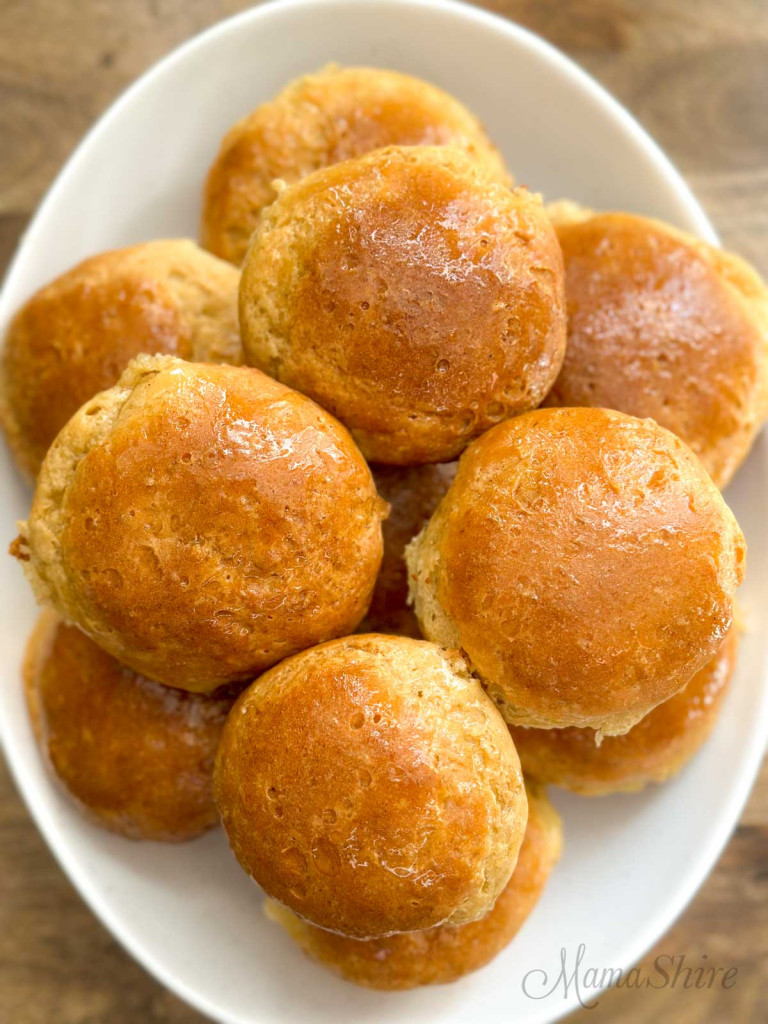
- Remove the rolls from the muffin pan and place them on a wire rack to cool. Optional: spread melted dairy-free butter over the top of the rolls.
- Let them cool for a few minutes and then enjoy!

How to store
Let rolls completely cool and store covered at room temperature for up to 3 days or refrigerate for up to 5 days.
How to freeze
After the rolls are completely cooled place wrap them tightly in aluminum foil and then place them in a freezer bag or storage container and freeze them for up to 6 weeks or double bag them in freezer bags. To thaw remove the rolls from the freezer and let them thaw on the counter. Can be served once they are thawed or they can be reheated.
How to reheat
To reheat the rolls cover them with aluminum foil and place them in a preheated oven at 350° and heat until warmed through 10-15 minutes.
Tools used for this recipe
- Stand Mixer – I used a Kitchen Aid stand mixer with a paddle attachment for this recipe.
- 12-cup Muffin Pan – This is my favorite muffin pan.
- Muffin Scoop – Using a large scoop makes it easy to fill your muffin tin.
- Oil Sprayer – My favorite oil sprayer can be easily refilled with avocado oil or olive oil.
- Spatula – These silicone spatulas are one of the most used items in my kitchen. This will help scrape down the sides of the mixing bowl and help scrape out the last bits of dough as you fill your muffin tins.
- Candy Thermometer – You may already have one but if not this thermometer will help to test the water temperature easily.
- Meat Thermometer – This instant-read meat thermometer can be used to test the internal temperature of the rolls. It’s not necessary but can be helpful with many recipes.
More gluten-free recipes you’ll love


Gluten-Free Rolls (Light & Fluffy)
- Prep Time: 70 minutes
- Cook Time: 45 minutes
- Total Time: 1 hour 55 minutes
- Yield: 12 rolls 1x
- Category: Breads
- Method: oven
- Diet: Gluten Free
Description
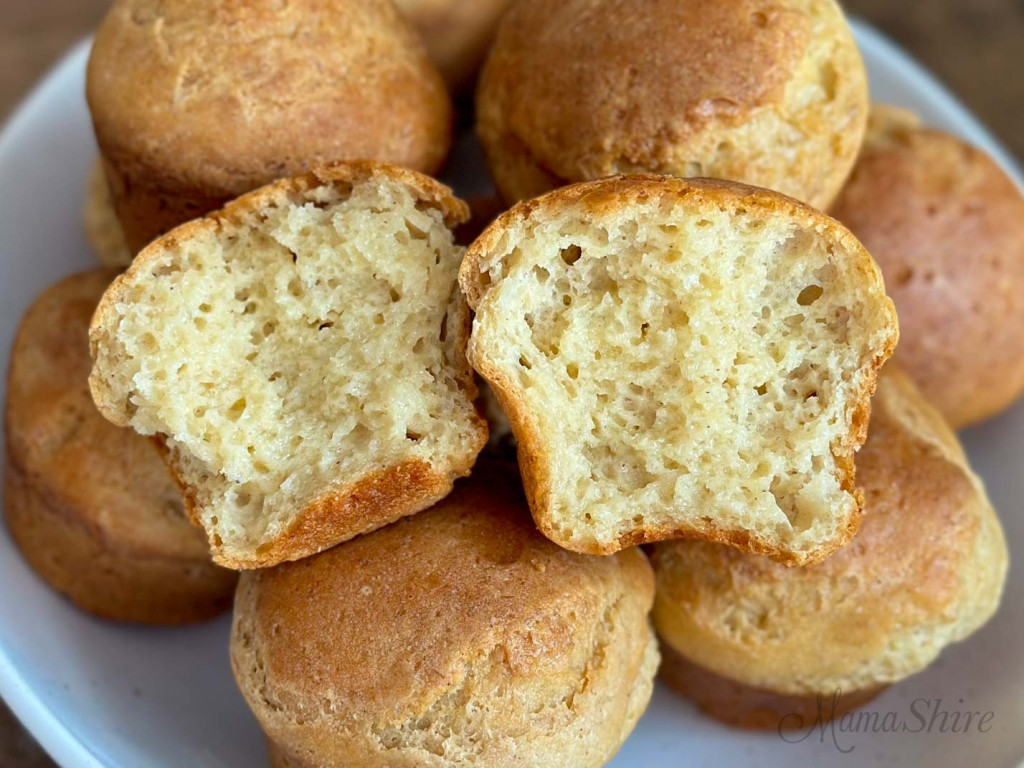
These delicious gluten-free rolls are flavorful and have the perfect crumb.
Ingredients
3 cups (14.32 oz) All-Purpose Pamela’s Gluten-Free Flour
½ cup (2.01 oz) sorghum flour
2 tablespoons psyllium whole husk
7 tablespoons cane sugar
2 ¼ teaspoons active yeast
2 ½ teaspoons sea salt
2 teaspoons baking powder
2 cups water, warmed to 110°
2 eggs, beaten
⅓ cup olive oil
2 tablespoons apple cider vinegar
Instructions
- Prepare a 12-cup muffin tin by spraying the bottom of each cup with avocado or olive oil. You can also use a paper towel dipped in oil to wipe the bottom of each cup.
- Warm the water to 110°-115° and set aside.
- In the bowl of a stand mixer fitted with a paddle attachment, place the gluten-free flour, sorghum flour, sugar, psyllium whole husk, salt, and baking powder in the bowl of a stand mixer. Place the yeast into the bowl but place it opposite of the salt.
- Next, add the warm water, beaten eggs, olive oil, and apple cider vinegar into the bowl of a stand mixer.
- Mix on low for 30 seconds and then increase speed to medium and beat for 1 minute. Scrape down the sides of the bowl if needed.
- Spray a large muffin scoop or ice cream scoop with oil and use that to fill each muffin cup 3/4 full. You may need to add a little more or take away a little of the dough to even out the dough in each cup. Dip your fingers in water and use them to lightly smooth out the top of each roll. They don’t have to be perfectly smooth.
- Lay a large piece of plastic wrap on your counter and lightly spray it with oil and then turn it over to loosely cover the muffin pan. Let rise for 45-60 minutes. Don’t let the dough rise too high and begin to spill over onto the pan.
- Place the oven rack in the middle of the oven and then preheat the oven to 350°. (Baking the rolls in the upper half of the oven will help keep them from browning too much on the bottom).
- Bake for 45 minutes until golden brown. You can also test the internal temperature of the rolls with a food thermometer. The internal temperature should measure around 200°- 205°.
- Remove the rolls from the muffin pan and place them on a wire rack to cool. Optional: spread melted dairy-free butter over the top of the rolls.
- Let them cool for a few minutes and then enjoy!
Notes
If using a different gluten-free flour mix be sure it contains xanthan gum. If not add 1/2 teaspoon per cup of flour.
You may also like


Baking with psyllium husk
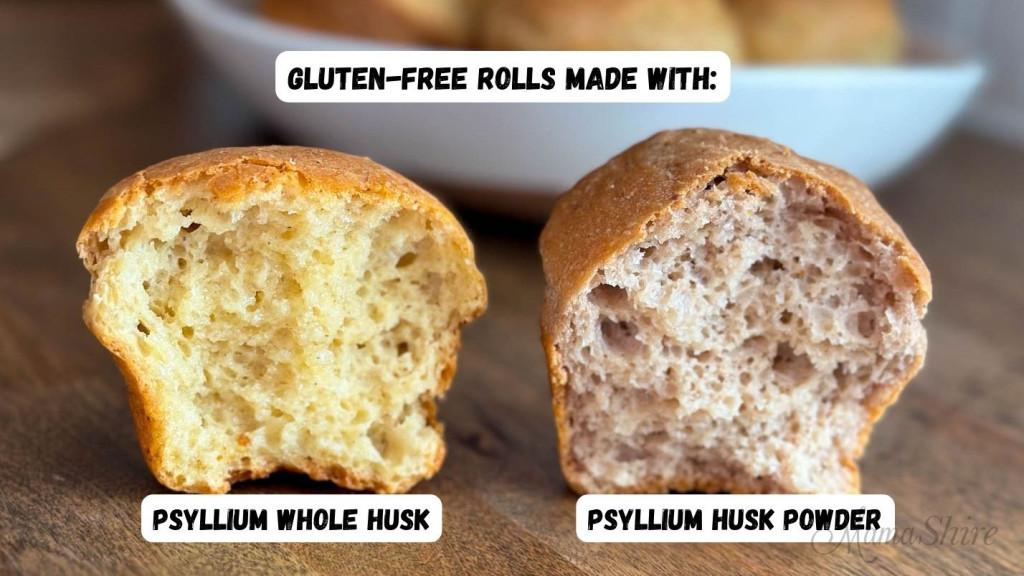
- Psyllium is from the seed husk of the plant known as blond plantain or blond psyllium and it is a soluble fiber that is great for gut health. It also works wonderfully in gluten-free baking because it forms a gel when combined with liquids that will help to give baked goods structure, and elasticity, and give them a light and airy texture.
- It can be purchased in whole husk form or powder form. In the picture above you can see the difference in the rolls when using psyllium whole husk and psyllium husk powder. When the psyllium husk is in powder form it reacts to different ingredients when baked and can turn your baked goods a purplish color. It doesn’t appear to change the taste only the color. For this reason, I recommend using psyllium in the whole husk form.
What to do with leftover rolls

- I really love these rolls and one of the ways I enjoy day-old rolls is to cut them into slices. I’ve made mini grilled sandwiches with them and I’ve toasted them in the toaster or air fryer. If you use a toaster I recommend getting some bamboo tongs to remove them from the toaster easily.
- You can also save the little ends and store them in a freezer bag in the freezer to use for making bread crumbs.
Leave a Reply